

IKEA Garage Makeover Inspiration and Guide
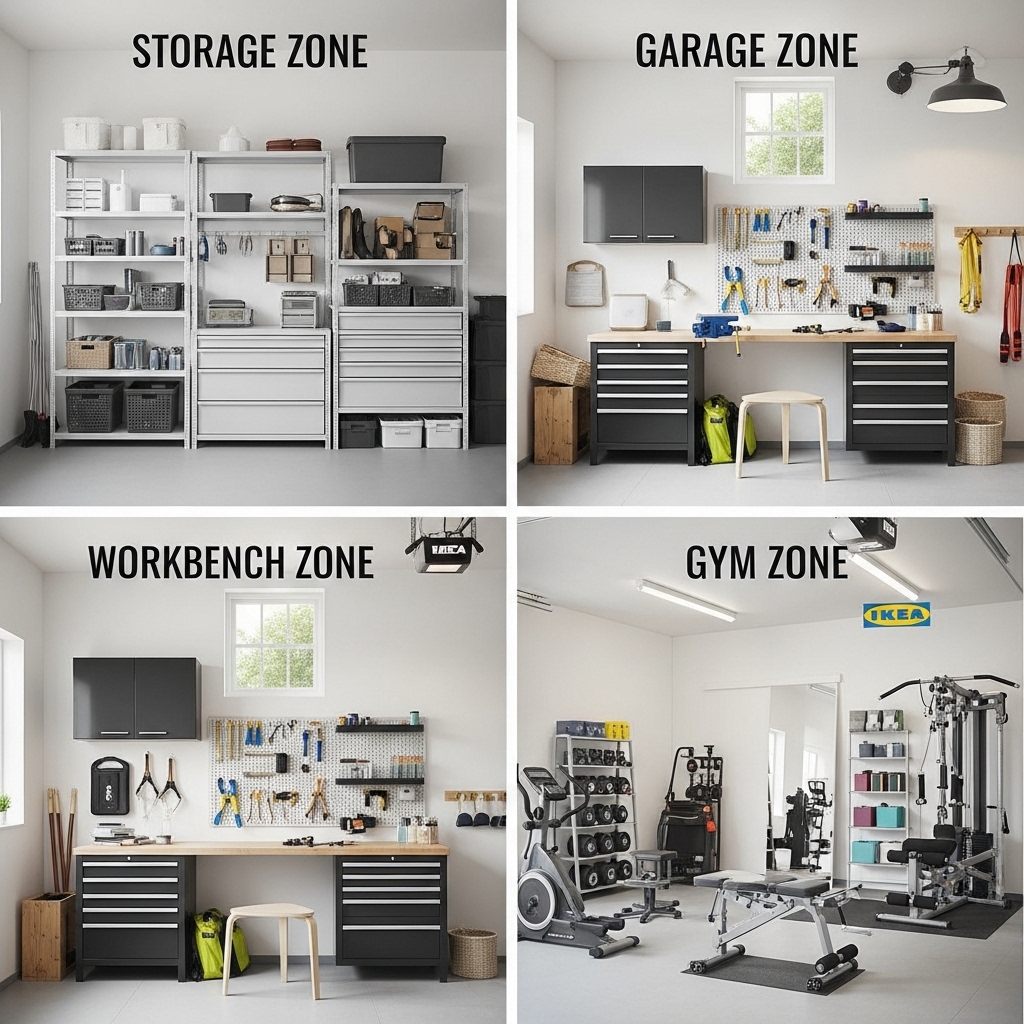
A garage makeover starts to work when the floor stops doing all the storage. Tools need a home near the work surface, seasonal boxes need shelves you can actually reach, and anything sharing space with a car must leave room for doors to open. Buying a matching set of cabinets before solving those details can leave you with a tidier-looking room that is still awkward to use.
IKEA can help with shelves, small-parts storage, work surfaces, and finishing touches, but the right choice depends on the garage itself. A dry hobby room and a damp garage with wet tires need different furniture. The ideas below show seven ways to organize the space, with product-selection advice, layout checks, and styling details you can adapt. Treat the images as layout inspiration; their appearance alone does not confirm the IKEA products, fixings, or load capacities used.
Choose IKEA storage for the garage you actually have
Check for roof leaks, water entering under the door, and condensation before buying furniture. Repair the cause of recurring moisture first. A painted finish or a plastic bin cannot make unsuitable furniture weatherproof. Also list what needs storing: a few hand tools, bulky camping gear, and a collection of weights create very different demands.
| Storage choice | Useful role | Check before buying |
|---|---|---|
| BROR shelving | Tools, equipment, and bins in an indoor garage | Exact shelf material, load rating, depth, required anchoring, and connectors |
| IVAR shelving or cabinets | Flexible storage in a dry, sheltered area | Suitability of each component for the conditions; assembly and anchoring instructions |
| TROFAST or KALLAX | Light hobby supplies, balls, towels, and accessories | Individual shelf or bin limits; these are not dedicated weight racks |
| BROR work bench | A defined surface for suitable household projects | Task requirements, total load, working height, and top maintenance |
| SAMLA boxes and SKÅDIS accessories | Sorting seasonal supplies and small everyday items | Box dimensions with lids, accessory compatibility, and appropriate wall fixings |
IKEA describes BROR shelving as suitable for garage storage and indoor use, with anchoring required. The series includes different shelf materials, so read the exact combination rather than assuming every BROR unit has the same surface or capacity. Product names, sizes, and availability can also vary by country.
1. Give each activity a boundary before you buy cabinets
Separate storage, workshop, and exercise areas make the garage easier to understand at a glance. The four-zone layout here uses shelving for supplies, a clear work surface for projects, and an open floor area for exercise. You can borrow that division without creating four full rooms: one storage wall and one genuinely usable work corner may be enough.
Start your garage makeover with the car parked where it normally sits. Open its doors and boot or trunk, then mark the remaining furniture footprints with removable tape on a suitable floor. Include drawer extension, cabinet door swing, and the space needed to stand in front of them. Operate the garage door through its full travel and keep tracks, sensors, and controls clear. An empty garage can make deep cabinets look much more practical than they will be on a weekday.
Choose one secondary use to prioritize. A garage art studio needs a different working surface and supply arrangement from a repair bench. If you want to use the garage as a gym, reserve the full movement area before filling the walls. Keep a clear route to the house door and any equipment that needs servicing.
2. Build a storage wall around the bins, not the other way around
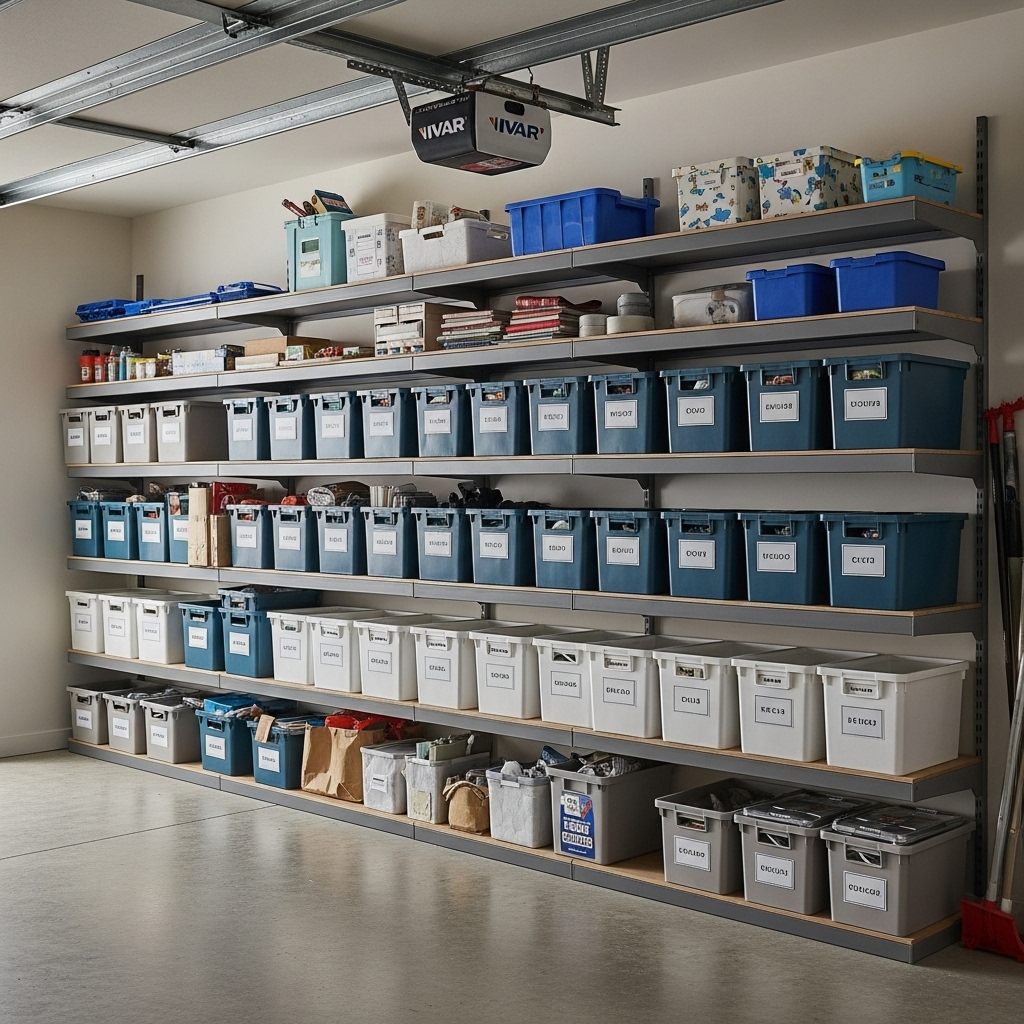
Repeated rows of labeled containers turn a busy wall into a readable storage system. Here, the long shelves and similar-sized bins create strong horizontal lines, while the labels give each container a specific job. That consistency matters more than buying every box in the same color. Copy the rhythm of the arrangement rather than assuming the pictured shelves are a particular IKEA system.
Measure your largest everyday container with its lid on, then compare that footprint with the usable shelf opening. Leave room to grip the handles and lift the box out. A bin that slides in tightly can still be frustrating to remove once it is full. Put dense equipment on lower shelves and lighter, occasional-use items higher up, following the product limits and installation instructions.
For a BROR layout, plan a first bay around the items you already own, then add sections only when the inventory justifies them. Use the connectors specified for the combination and secure it as instructed. Cabinets can conceal awkward supplies, but open shelving makes sense for frequently handled bins. Mix the two deliberately instead of enclosing everything and paying for doors you do not need.
3. Make the workbench fit the work
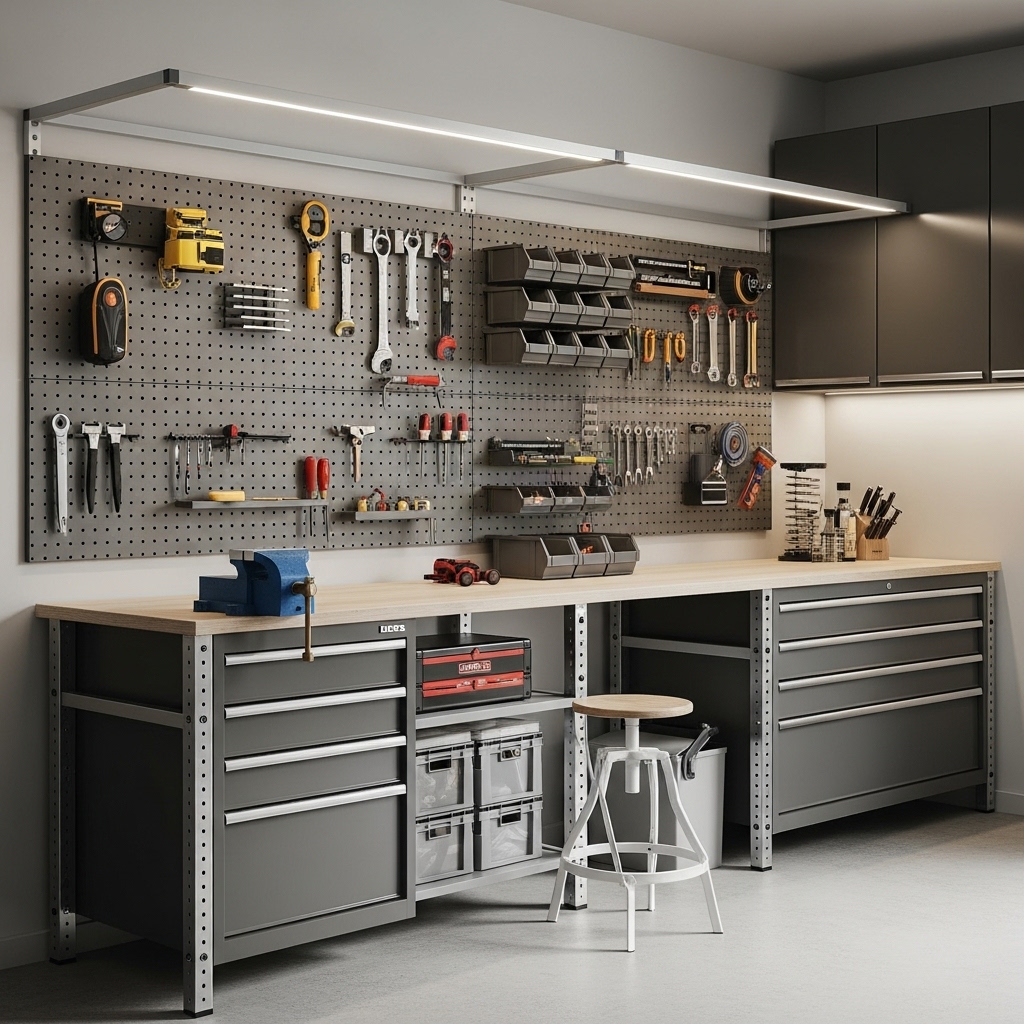
The broad worktop, drawer banks, and tool wall create a workshop where small items stay close to the action. A clear central surface is the key feature: it leaves somewhere to place a project instead of forcing every repair onto the floor. The stool can be useful for detailed tasks, provided it does not block standing work or the route past the bench.
Choose the bench according to what happens on it. Sorting components and wrapping parcels are different from hammering, clamping, or using a vise. A LINNMON top with ADILS legs is a desk arrangement; its honeycomb paper-filled construction should not be treated as a general-purpose workshop bench. A KARLBY top resting on ALEX drawers also needs a properly planned support arrangement, and does not automatically become suitable for heavy workshop tasks.
The BROR work bench is a more relevant starting point for suitable household projects. Check its current load rating and instructions, and confirm suitability before adding mounted equipment. Use a purpose-built bench when the task demands it. Above the surface, a properly fixed SKÅDIS pegboard can organize compatible small accessories; heavier tools need storage and fixings rated for their loads.
4. Use cube storage for gym accessories and a proper rack for weights

A low cube unit makes a compact fitness corner feel orderly without filling the floor with tall furniture. The open compartments keep balls and soft accessories visible, while the boxes hide smaller items. Wall storage leaves the mat area open. The weights pictured beside the unit illustrate an important distinction: storage for gym accessories and storage for heavy equipment are separate decisions.
Use KALLAX-style compartments for light items such as towels, yoga blocks, or resistance bands, within the exact product limits. Keep dumbbells, kettlebells, and weight plates on a purpose-built rack or another manufacturer-approved storage solution. A general shelf rating does not by itself establish suitability for concentrated weights, repeated impacts, or dropped equipment.
For a small garage gym, lay out the exercise mat and test your movements before placing furniture. Choose flooring intended for the activity and substrate; a decorative rug is not an impact-protection system. Pull-up bars and suspension equipment need their own load-rated installation. A pegboard hook or ordinary wall shelf is not an exercise anchor. Never run a vehicle in an attached garage, even with the door open, as the CDC advises.
5. Sort small parts into removable task trays

Shallow trays keep tools and hardware visible instead of burying them at the bottom of a large box. The separate compartments here let screwdrivers, spanners, and fasteners occupy their own spaces. This approach works especially well inside a drawer, where you can scan the contents without lifting out several unrelated containers.
Sort by the way you work. One tray might hold furniture-assembly tools, another picture-hanging supplies, and a third bicycle-repair accessories. Keep screws and other tiny parts in smaller closed, labeled containers within the tray; open slotted baskets are better for larger tools. A removable project tray can travel to the job and return to a clearly marked shelf afterward.
VARIERA-style organizers or other washable inserts can help, but check their usable dimensions against the drawer before ordering several. If you prefer making your own, these small wood box ideas offer another way to divide supplies. Keep chemical products in their original labeled containers and follow their storage instructions. An attractive basket does not replace storage intended for hazardous materials.
6. Light the work surfaces, then add a restrained color scheme

Pale walls and a light floor make this garage feel open, while dark drawers and wood-look work surfaces give the furniture a clear outline. The small yellow chair adds a focal point without making every storage item compete for attention. Overhead fixtures support the overall room, but the work surface still needs lighting positioned for the task.
Plan general lighting for moving around and focused lighting for sorting parts or using the bench. Test the position while standing where you will work: a fixture behind your shoulders can cast your own shadow across the surface. Choose fixtures suitable for the actual moisture, dust, and temperature conditions. Ordinary indoor desk lamps are not automatically appropriate for every garage, and a new circuit or fixed wiring calls for a qualified electrician.
Carry one accent color through a chair, a few bin labels, or drawer fronts. Keep floor decoration within a clean hobby corner and away from the parking route, workshop debris, and wet entry points. The layered rugs in the inspiration soften the room visually, but a real working garage may be easier to maintain with a clear floor and an appropriate task mat.
7. Store seasonal items by the trip you need to make
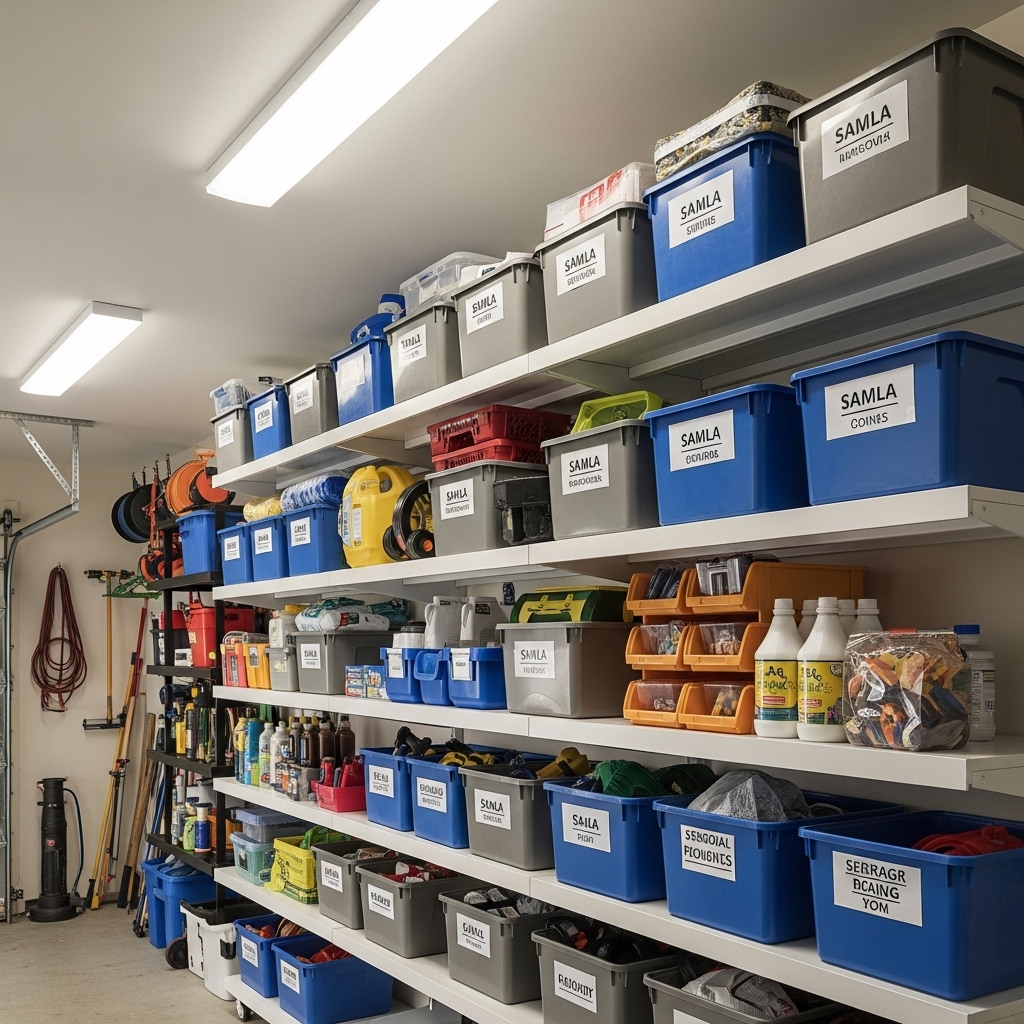
Labels facing the aisle make this seasonal storage wall easy to scan. The mix of large boxes, smaller trays, and hanging tools also gives different-shaped items different homes. Copy that variety: forcing every object into one oversized bin tends to create heavy boxes and wasted space.
Group items by the occasion when you need them. Keep tent accessories with the camping kit, outdoor lights with their fittings, and holiday decorations with a simple contents list. Put the items used together on the same accessible shelf. Lightweight seasonal pieces can occupy higher positions, while heavy boxes belong lower down. Leave enough room to remove one container without dismantling the entire row.
SAMLA boxes with matching lids can make contents visible and help protect them from dirt and dust. Do not assume they provide flood protection or controlled humidity. Dry equipment before packing it, and keep moisture-sensitive belongings elsewhere if the garage cannot provide suitable conditions. For broader layouts, these two-car garage organization ideas can help you divide seasonal storage from daily access.
Style the garage with one of three practical palettes
A coordinated garage usually comes from repeating a few choices, rather than adding more decoration. Pick the palette after deciding what existing furniture you will keep. You can often bring mismatched units together through consistent labels, restrained accessories, and one wall color without repainting every surface.
Industrial workshop: dark storage, pale walls, one bright accent
Pair black or charcoal storage with a light wall and a wood-toned work surface. Repeat the dark finish in small accessories so one cabinet does not look isolated. Use a bright accent for a chair or category markers, while keeping text labels readable. This palette suits a tool-focused space, but enough task lighting matters when dark drawers contain dark tools.
Light utility room: white storage and clear boxes
Use pale shelving, transparent containers, and a consistent label position for a quieter visual effect. Closed storage can conceal irregular supplies, with a few open shelves reserved for things you reach for often. Pale fronts show marks, so check cleaning instructions and choose surfaces you are willing to maintain. Avoid relying on delicate decorative baskets where dirty equipment needs washable containers.
Warm hobby corner: natural-looking wood and a muted color
In a dry area, bring wood-toned storage together with a muted blue, green, or neutral accent. Keep the open surface available for the hobby itself, then add one personal detail on a wall away from the work. If you like the cabinetry in these DIY IKEA closet ideas, borrow the consistent fronts and clear organization, while choosing products suitable for your garage conditions.
Buy and install in an order that avoids expensive rework
Complete one useful section before ordering a garage full of matching furniture. A storage bay that holds the actual equipment gives you a much better basis for the next purchase than an empty-room sketch. Budget for the complete setup, including delivery, correct fixings, connectors, lids, organizers, lighting, and any repairs or professional work.
- Inventory and remove: group belongings by activity, dispose of unwanted items appropriately, and measure what remains. Keep only garage-suitable belongings in the plan.
- Resolve the room conditions: deal with leaks and damaged surfaces, then confirm where furniture and lighting can be installed. Preserve access to services and operating equipment.
- Mark and test: tape out the first storage bay and bench footprint. Test car doors, drawers, pathways, and the garage door with everything in its normal position.
- Install the core furniture: follow the exact assembly and anchoring instructions, using fixings appropriate to the wall. Get help where the substrate or installation requirements are unclear.
- Load and adjust: follow the stated limits, keep dense items low, and check that containers can be lifted out comfortably. Add organizers only after the main shelves are working.
- Finish the room: add labels, task lighting, and the chosen accent color. Revisit the arrangement after normal use and move anything that repeatedly lands on the floor.
The strongest first purchase is the one that removes a daily obstacle: a shelf for boxes blocking the car door, a bench that replaces floor-level repairs, or a drawer system that stops tools disappearing. Expand from that result rather than filling every available wall at once.

