

IKEA Coffee Bar Hacks Every Coffee Person Needs

A useful coffee bar gives every part of the morning routine a place: the machine, the cups, the coffee supply, and somewhere to set a drink while you finish making it. That can be one section of the existing kitchen counter or a separate piece of furniture. The right choice depends on how much equipment you use and where it can operate comfortably.
IKEA coffee bar hacks work best when the storage follows that routine. Open cubes can hold mugs and baskets, a cart can keep supplies together, and a cabinet can conceal the less attractive extras. The machine still needs a suitable surface, accessible power, and the space its instructions require. A beautiful shelf arrangement is only helpful if you can refill the water tank without dismantling it.
Choose the setup that solves your space problem, then use color, repeated materials, and a few practical accessories to connect the coffee area with the room.
Choose the Job Before Choosing the Furniture
Separate the brewing surface from supporting storage in your plan. You may only need a supply cabinet beside an already suitable counter. That can be a better use of a budget IKEA hack than moving the appliance onto furniture that needs extensive alteration.
| Your main need | An arrangement worth considering | What to establish first |
|---|---|---|
| More order on the existing counter | A tray plus appropriately installed nearby shelving | Access above the machine and a clear cup landing area. |
| Supplies that can move between rooms | A cart for mugs, filters, and packaged ingredients | The exact cart’s loads, stability, and storage dimensions. |
| Open and hidden storage together | A cube unit with suitable inserts | Required anchoring, usable height, and the suitability of any working top. |
| A quieter appearance in a dining space | A closed supply cabinet near the brewing area | Interior access, the cabinet’s intended installation, and surface care. |
| A more permanent fitted arrangement | A planned cabinet run with appropriate support and countertop | Full dimensions, installation requirements, appliance clearances, and the total project scope. |
1. Create a Countertop Coffee Zone With Shelving Above

The pale shelving and repeated mugs give a compact stretch of counter a defined purpose. Copy the organization of the idea: keep a few cups and daily supplies together, then preserve a clear working area around the machine. A narrow shelf can create order without requiring a separate cabinet on the floor.
Choose shelving for its intended installation, not simply because a social-media arrangement looks stable. IKEA specifies that HAGAÅN wall open cabinet 005.355.25 must be wall mounted. Treat it as a fixed storage option, not a no-fixing countertop riser that can be placed upright or sideways at will. Alternatively, choose a purpose-designed countertop organizer that suits the available space and load.
Before setting shelf height, check the machine’s manual, steam path, water-tank removal, bean hopper, and controls. Keep mugs within reach without requiring you to lean over a hot appliance. The counter should still have a stable place for a cup outside the drip tray.
2. Use a RÅSKOG Cart to Move the Supplies

A three-tier cart groups cups, jars, and a basket into a small footprint. It is useful for supplies that otherwise spread between drawers and cabinets. Give the upper tier to the items you reach for most often, and use the lower levels for contained extras. Leave enough room to lift a mug out by its handle rather than squeezing a second storage layer above it.
Treat a cart as supporting storage unless its construction, surface, and the appliance instructions establish that it is suitable for operating the machine. The current U.S. RÅSKOG 305.867.83 listing specifies 13 pounds per tier and 40 pounds total, with lockable castors. Check the exact version you own and count all contents, including water. Castor locks do not turn a mesh storage shelf into a suitable appliance worktop.
Park the cart where it does not narrow a doorway or catch the machine’s lead. Roll supplies into position before using the station; do not move hot drinks or an operating appliance around the room.
3. Organize a KALLAX Station Around the Cubes
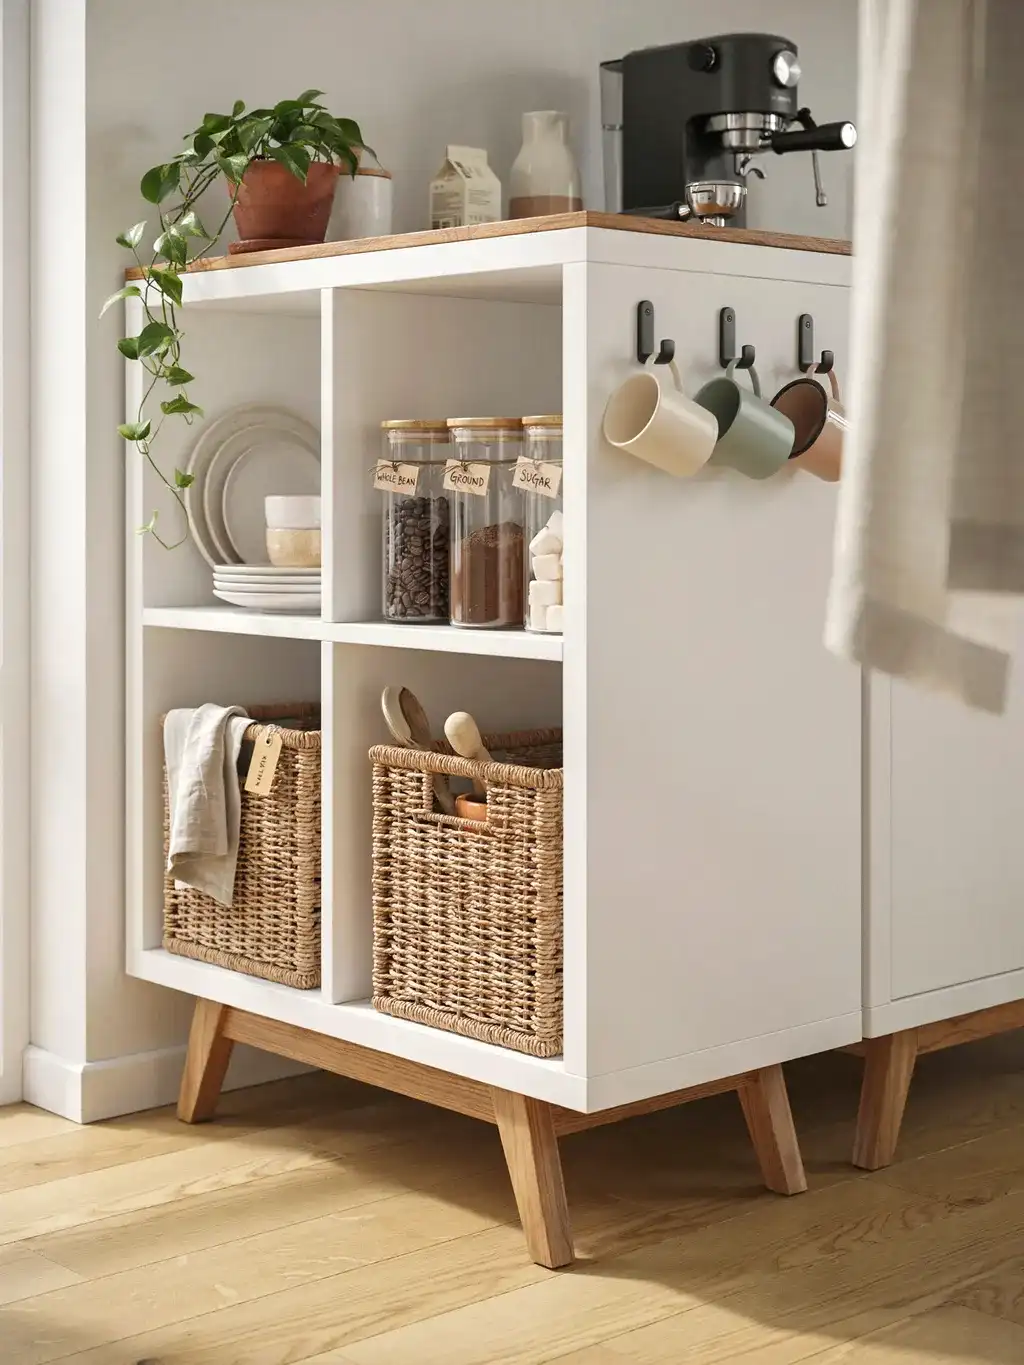
The cube layout separates open display from basket storage. Use one accessible compartment for daily cups, another for filters or coffee supplies, and a closed insert or basket for backups. The repeated square openings provide enough visual structure that you do not need a decoration in each one. A restrained top keeps the arrangement from looking like overflow kitchen storage.
For a lifted silhouette, choose a manufacturer-compatible arrangement rather than attaching arbitrary legs. IKEA lists KALLAX combinations with an underframe; confirm the exact unit, intended orientation, and required securing. A compatible underframe does not by itself establish that the top is suitable for your appliance.
Check the top’s stated load and surface care, and include the whole appliance footprint and required clearances. A loose decorative board does not automatically provide a supported, water-resistant worktop. In a small apartment, keep baskets removable and the full cabinet depth clear of the walking route.
4. Choose a Closed Coffee-Supply Cabinet
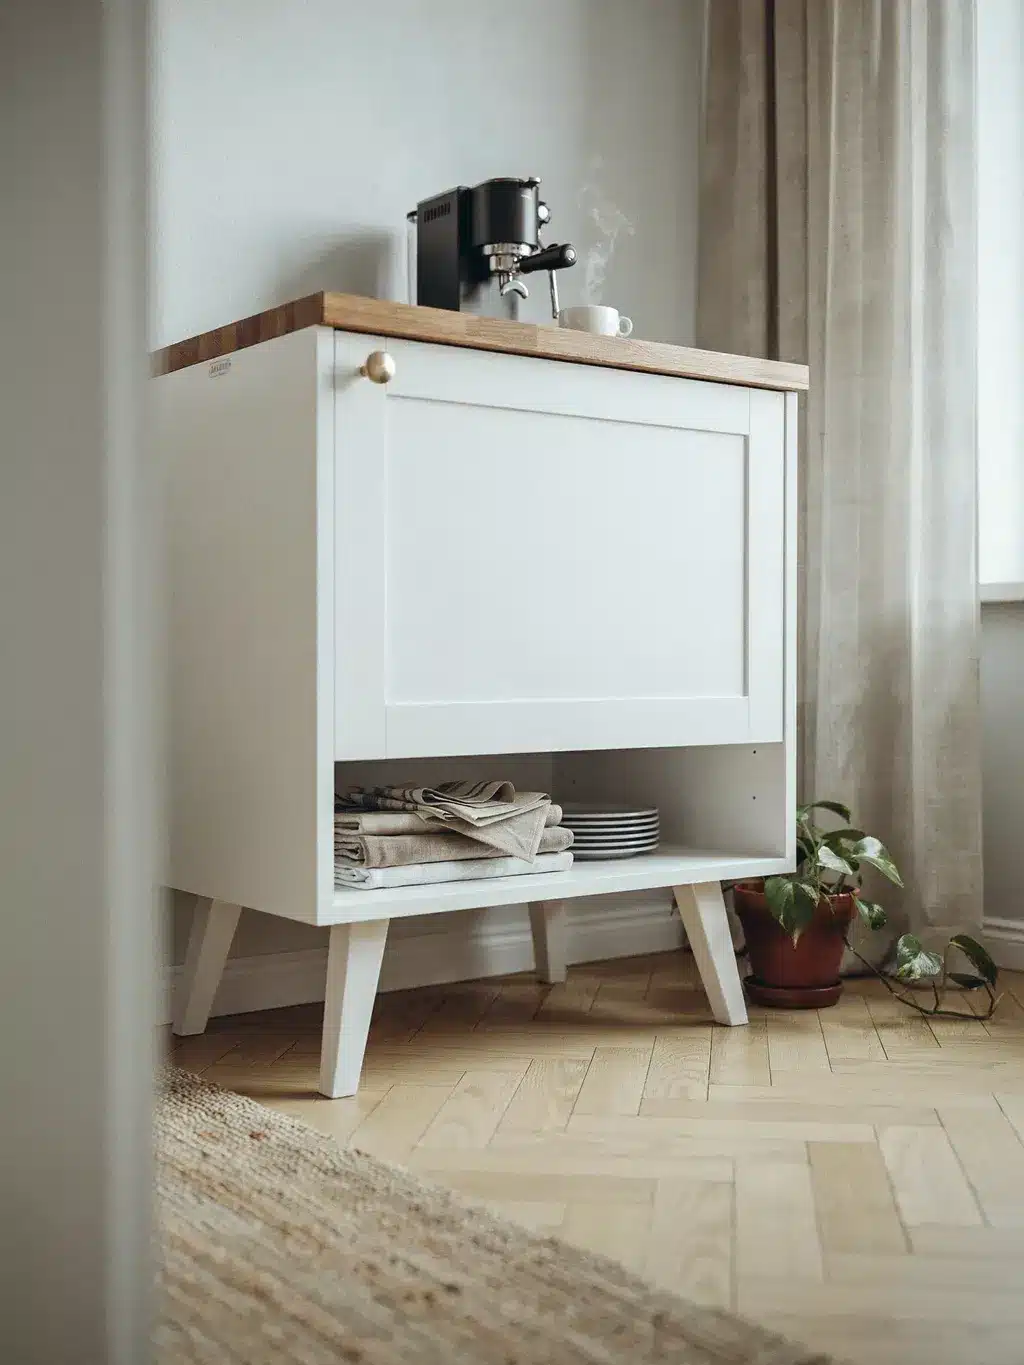
A plain closed front can make a coffee area feel settled in a dining room or hallway-adjacent space. Store the items that look busy behind the door: spare filters, unopened supplies, cleaning accessories kept separate from food, and less-used cups. Keep the daily items together so opening the cabinet does not become a search through unrelated belongings.
Use a cabinet in its specified orientation and with its required support. BAGGEBO cabinet 604.812.04 is a verified closed-storage option that requires secure anchoring. Turning it upside down and adding EKET legs is not a documented compatible conversion on that listing. For a raised cabinet, select an approved support arrangement or a piece designed with the base you need.
A small hardware change can personalize suitable fronts, provided the replacement fits the door construction and screw length. Keep the appliance on a separately suitable surface unless the full cabinet setup has been checked for that purpose. Storage height and brewing height do not need to be identical.
5. Plan a HAVSTA Coffee Wall With Properly Supported Storage
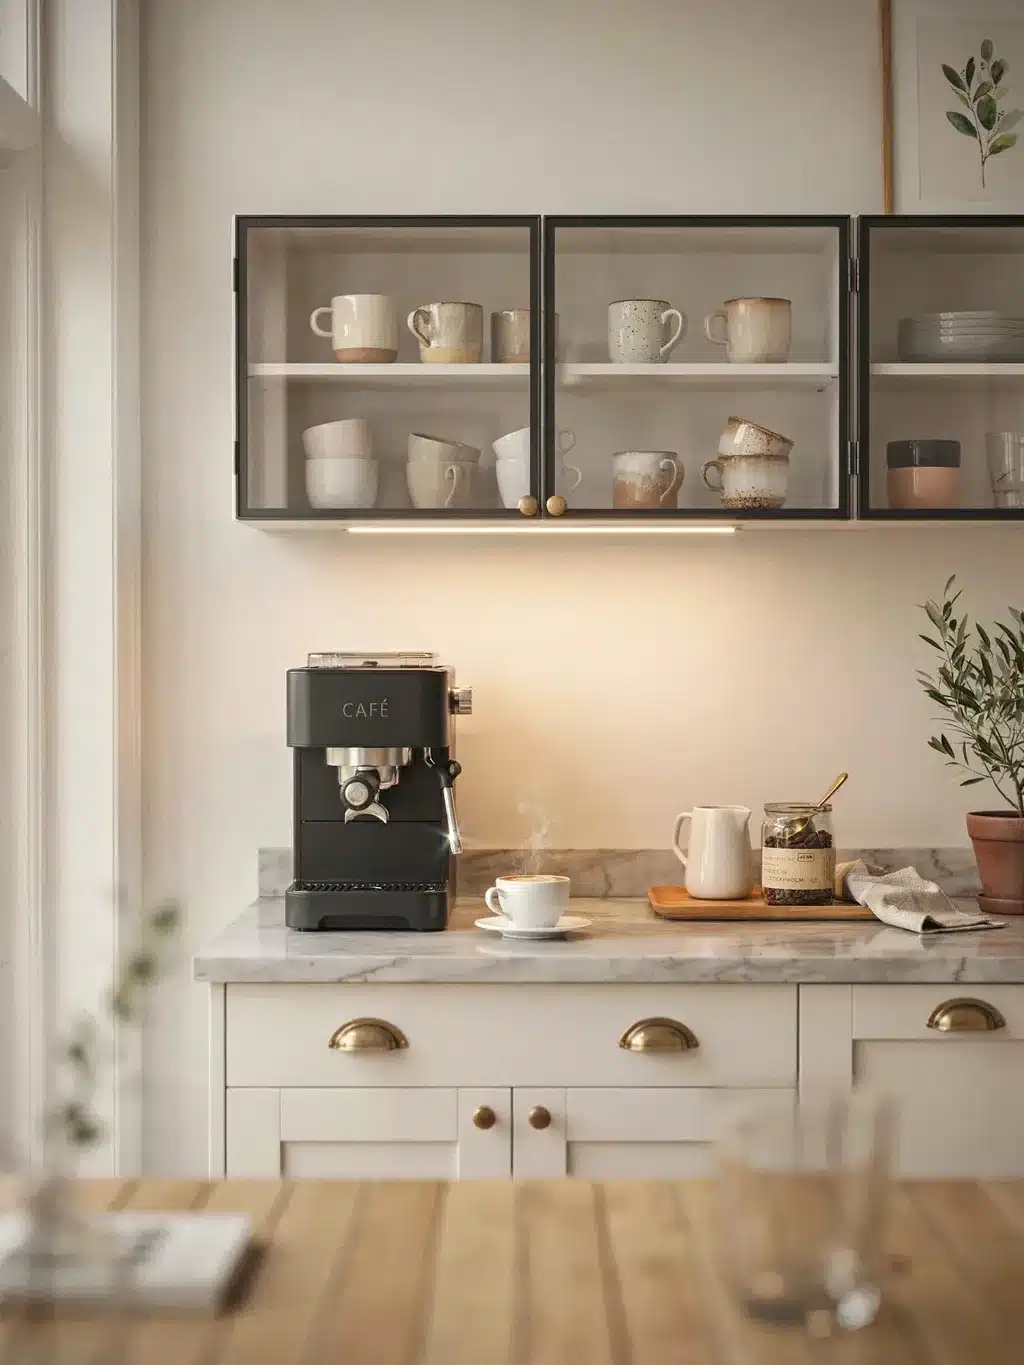
Closed lower storage and glass-front display create two different layers: supplies can stay out of view, while mugs and a few serving pieces remain visible. Repeat the cabinet finish across the run and keep handle placement consistent. If you use glass-door storage above a counter, leave practical access to the contents without crowding the machine below.
Use HAVSTA components only in permitted combinations. IKEA’s HAVSTA buying guide describes compatible base and stacking arrangements and states that the units are not to be hung on a wall. A supported stacked upper cabinet is different from a kitchen wall cabinet. Required anti-tip fixing still applies.
Have the countertop, supports, joints, and edges detailed for the installation rather than laying a heavy remnant over furniture and assuming it is secure. A refrigerator needs its own installation and ventilation requirements; an ordinary freestanding model cannot be treated as a built-in because it fits the opening. Budget for these details before choosing the decorative finish.
6. Compare a Kitchen Cart, Dresser, and Modular Storage
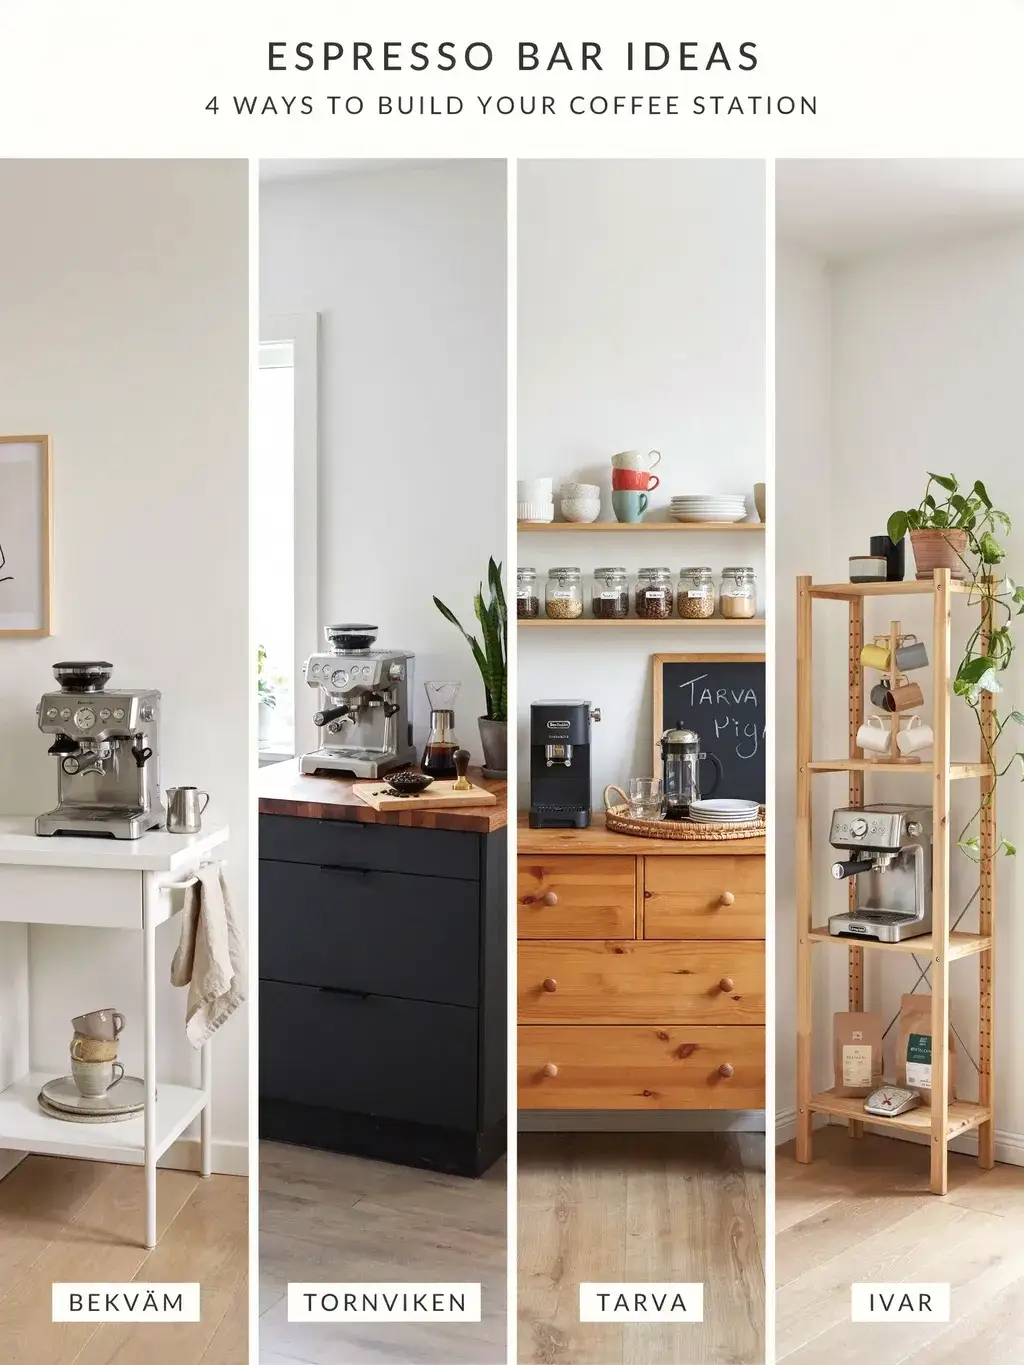
The different silhouettes in the planning illustration offer several routes: a compact cart, a more substantial kitchen unit, drawer storage, or an open shelf run. Choose by the job each piece must do. A drawer unit may be useful for linens and supplies, while a kitchen cart can offer a different surface and access arrangement. Matching the footprint is only the first check.
BEKVÄM is a kitchen-cart example, but even kitchen furniture needs its dimensions, loads, surface treatment, and stability checked against the equipment. TORNVIKEN, TARVA, IVAR, and BESTÅ also include different products with different construction and installation requirements. A series name does not establish appliance suitability or interchangeable fittings.
For a drawer-based setup, keep the heaviest or most-used supplies where they can be handled comfortably within the stated loads. Do not alter a dresser’s structure or remove required securing to create a coffee cabinet. If the existing counter works well for brewing, use the new furniture to handle storage instead.
7. Move Lightweight Storage Onto the Wall

The pegboard, shelves, and hanging mugs create separate levels above the coffee area. Use that idea to clear the surface without putting everything overhead. A few everyday cups can hang at an accessible height; filters and light tools can use compatible holders. Keep the arrangement outside the appliance’s required heat and steam clearances.
Choose wall fixings and accessories for the actual surface and load. A LACK shelf, SKÅDIS pegboard, and mug rail each need their own installation details; they are not interchangeable mounting systems. Check the combined weight of cups and hooks, and keep handles far enough apart that neighboring mugs do not knock together.
Place frequently used items where you can reach them without leaning over the machine. Heavy jars and full bottles are usually easier to handle at a suitable lower level. Reserve one part of the wall for a small print if you want decoration, rather than turning every peg or shelf into storage.
8. Style the Station Around a Tray and a Small Palette
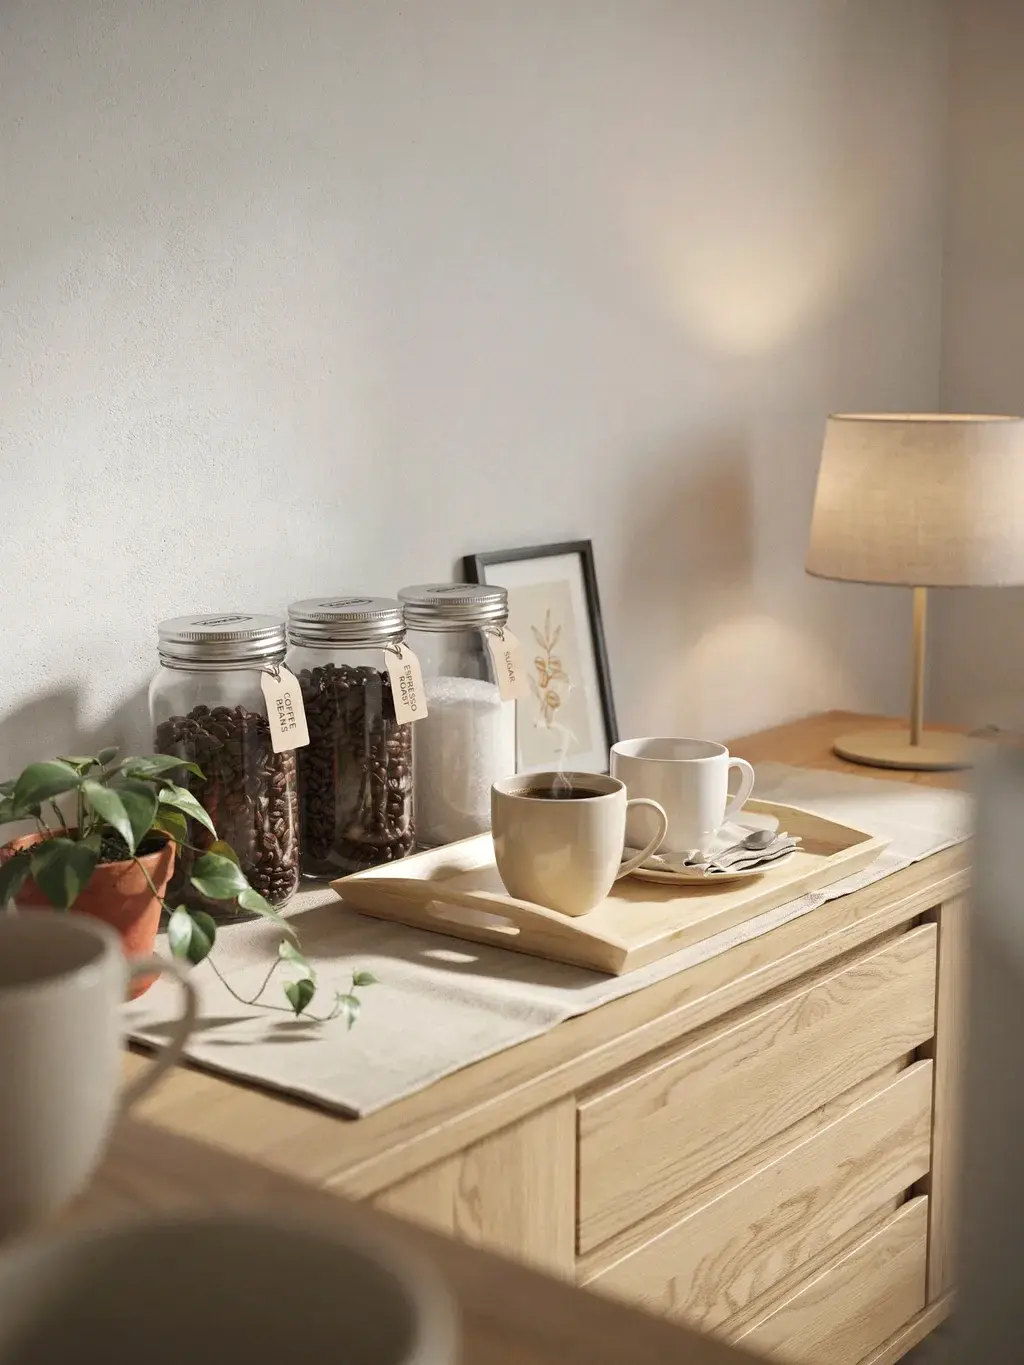
The warm wood surface, pale cups, grouped jars, and shaded lamp give this corner a consistent palette. Copy those relationships rather than buying every accessory. Start with a small tray for the daily loose items, place taller containers behind the lower cups, and preserve a landing area where a finished drink can sit comfortably.
KORKEN jars are one IKEA food-storage option, but decant only the supplies that benefit from it. Keep ingredient, allergen, and date information available, and follow storage directions on the original packaging. Milk and other ingredients requiring refrigeration belong in appropriate cold storage, not permanently on a display tray.
A tray groups the arrangement and can make cleanup easier, but it should not be treated as a heat or waterproof barrier unless intended for that use. Keep a lamp, plant, and artwork clear of steam and splashes. The best decorative addition is the one that does not need moving every time you make coffee.
Choose One Styling Direction
Warm and natural: Pair a wood-toned base with cream cups and one woven storage element. Use a plain ceramic vessel or plant as the accent, with the working surface left clear beside it.
Simple and graphic: Repeat black in the machine, hooks, or hardware, then use pale cups to keep the arrangement readable. Store brightly printed packaging inside a closed compartment instead of adding more matching jars.
Soft traditional: Combine paneled fronts, restrained warm-metal hardware, and muted color. A sage-green palette can connect the cabinet with nearby furnishings; use a coating system suitable for the furniture if repainting. Let one patterned textile provide the detail.
9. Test the Setup Through a Complete Brewing Routine
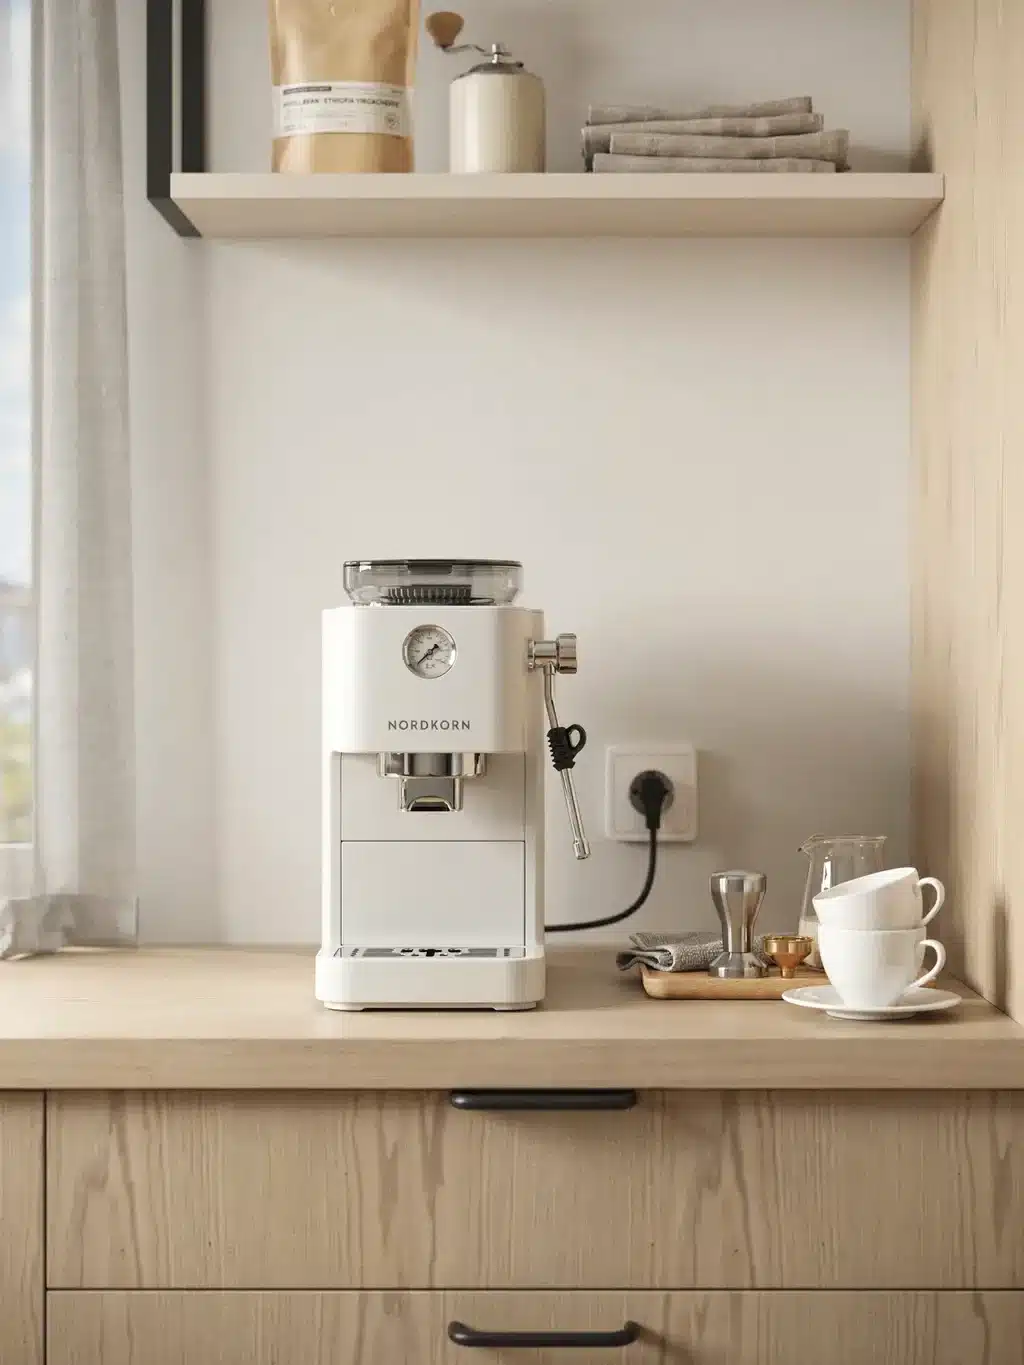
A compact machine with clear space beside it is easier to use than one surrounded on every side. Before fixing shelves or ordering furniture, run through the tasks with the machine off: remove the water tank, open any lid or hopper, reach the controls, lift out the drip tray, and check the position needed for a milk jug. Include the space required by the cord and plug.
The operating surface and clearance requirements come from the machine’s own manual. For example, Breville’s Oracle Jet instructions specify a stable, level, heat-resistant surface and prohibit operating that model inside a cupboard. Do not assume opening a cabinet door makes an enclosed machine installation acceptable. Other machines may have different requirements, so use the instructions for yours.
Locate appropriate power before deciding the station’s final position. Keep leads clear of hot surfaces, water, sharp edges, and moving furniture, and follow the appliance’s electrical instructions. Use qualified help where a new socket or fixed lighting is needed. A comfortable working height is the one that lets you refill and operate the equipment without an awkward reach.
Set Up Three Practical Areas on the Surface
Give the station a brewing area, a preparation area, and a landing area. Their size depends on the equipment and the way you make coffee. An espresso setup with a grinder and tamping routine needs different space from a capsule machine. Mark the actual footprints before adding decorative items.
- Brewing: Keep the appliance on its suitable surface with the clearances its manual requires.
- Preparation: Put the tools or supplies used before brewing together, with a clear place to work.
- Landing: Leave room for the finished cup, spoon, or milk jug without balancing it on the machine or reaching across hot parts.
Keep cleaning supplies separate from ingredients and give removable parts a practical route to the sink. If the coffee bar is far from water, choose a spot where carrying the reservoir or cleaning the drip tray will still be manageable. This is a useful check before investing in a fitted coffee station.
Finish the Parts You Will Touch and Clean Every Day
Choose the surface treatment for likely splashes, heat exposure, and cleaning, not just for its appearance. A protective mat must itself be suitable for the appliance and must not block vents or make the machine unstable. Wipe spills promptly and inspect any seams or cut edges according to the surface manufacturer’s care guidance.
For a fitted arrangement, price the full project: furniture, required supports and fixings, countertop fabrication, finishing, delivery, and any electrical or installation work. For a small refresh, try a tray and a storage change first. You may recover enough space without replacing the base.
Test the station with its normal contents before adding the final accessories. If the cup has nowhere to land, remove something. If the water tank catches a shelf, change the layout before using the appliance there. The finished coffee bar should make the routine easier, with decoration that fits around the work.

